with the occasional rant about tin openers...

Wednesday, August 9, 2017

Best Bitter, for cask.


Having brewed nothing at home for nearly a year, I’m making up for it now. The same can be said for this blog. Nothing new for years, and now I’ve a backlog of posts. Not because I’ve got more to say, necessarily, but I’ve finally got the hang of separating the content. So, to tease, the next couple of posts will include:

  • Toys for a Tenner: All the best toys for really keen homebrewers
  • Great Gruit: Brewing with Kviek and some not-hops
  • In good nick: Real ale, and how to get beer on the floor and in your face
  • Get pally at your local: Building an awesome bar from pallets

Onto the bitter. The recipe is similar to the last, because it was really very good. The changes include swapping out some crystal malt for Munich and Aromatic, simply because I wanted to try the Munich, and I was sent more Aromatic than I needed, and less crystal because I wasn’t. In they go.

This is a single hopped beer (not like that Double Hopped madness from Diageo, Hophouse 13), in that it is bittered, flavoured and aromad by Pilgrim. I’m nowhere near the end of the British hop list yet, so I’ve no interest in American or NZ hops when there are still so many varieties to try nearer to home. Pilgrim was described as "deeply fruity, lemon/grapefruit aroma with flavour characteristics including verdant, berries and pears. As a bittering hop it provides a refreshing, full-bodied and rounded bitterness" by The Homebrew Company, and they recommend its trial, so having enjoyed it in the first batch, I’ve stretched to another packet of pellets for bittering. I need to use some leaf hops to help filter out the trub etc, so the last additions will be leaf, totalling about 70 grams (This is a double batch, aiming for 44 litres in the fermenter). 70g won’t sound like much to many of you, I’m sure, but this is a session beer, remember. Drinky drinky, not sippy sippy.

The yeast is a reconditioned Fuller’s bottle, and it’s being stirred right up until pitching. This is its second run for me, and seems in good condition, so I’m happy to pitch later this evening. It’ll be a two litre starter, but I’ve no idea what that means in terms of yeast cell growth, as the starting quantity was one metric dollop, and it’s viability unknown.
I think the Fuller’s strain is WLP002, English Ale or something, should you want to pay €8 for it.
The recipe:
Minch pale (4-6srm) 5.8 kg
Munich malt (  ) 500g
Crystal 40 (80), 300g
Aromatic malt 200g
Torrefied wheat 500g
Water: down to 35ppm alkalinity, and added 10g CaSO4, 4g CaCl. 22.5l, should give roughly 3:1 litres:kg. God only knows what the Sulphate : Chloride ratio will end up, but going from experience it should be roughly 2:1, with about 200 – 300 ppm sulphate, and half of that in Chloride. That will leave plenty of Calcium for the yeast. Treated enough water to liquor back at the end.


Temperature settled at 65oC, so should get the FG down to 1010.
The grist yielded 44 litres of 1046, with plenty more sugars left to extract (sparge stopped at 1020).
Boil:
Pilgrim (pellet) 10.3%aa, 42g
Pilgrim (leaf) 10.4%aa, 35g (+ ¼ tablet protafloc)
Pilgrim (leaf) 10.4%aa, 25g

1 small handful added to cask. Book says so.
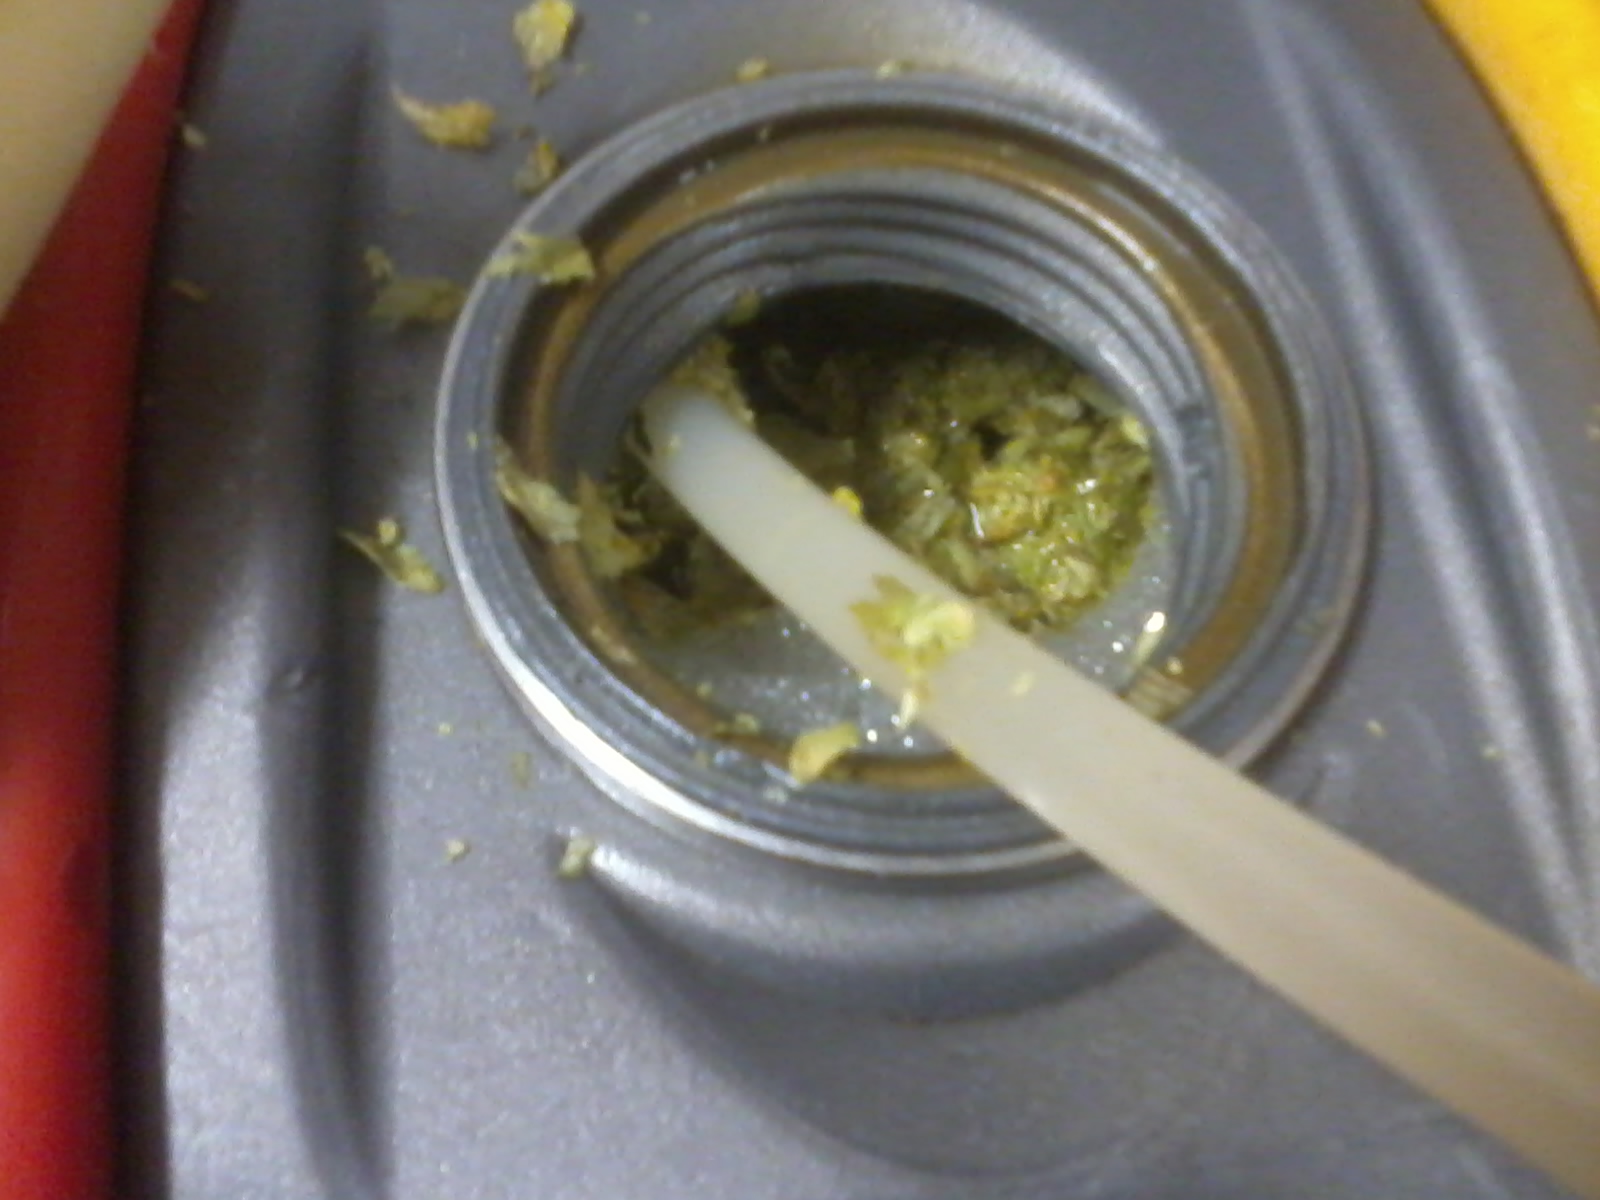
The wort is an excellent dark copper colour, which pleases me. This was acheived by using a little chocolate malt the last time, but I think I tasted it in the form of a little dryness, so to have this happen accidentally from the Munich etc is a pleasant, though not entirely unexpected surprise.
Why am I bothered by the colour? The beer is to be served at a wedding, alongside a locally brewed golden ale, and a locally brewed stout. It’s nice to brew a beer that’s a different colour, and nobody wants to drink a red ale all day: I speak from experience.

Result:
So, about all I can remember is that it was delicious, very popular, was lighter (colour) than I expected, and needed about another week for some of the hop roughness to smooth out. However, an excellent beer, of which many a pint was had. This was in contention with a locally brewed golden ale and a stout, and they all pretty much emptied at the same moment, so I’m pleased with the result.
Not so pleased, however, that I won’t be adding back some more crystal malt the next time!

Thursday, March 30, 2017

Homebrewed is Best

It’s nearly April, not that that means anything by itself, but I’ve wanted to brew a bitter for a while now. I reread Pete Brown’s ‘ManWalks Into a Pub’, an excellent book on the evolution of the British public house, and frankly that made me very thirsty. I’ve also been reading TheDoghouse, a pub-based periodical from Ludlow, who also run a micropub from the same office. Fancied a pint.
But no, I’ve wanted to brew a bitter since before then, too. I meant to brew one for the Belfast CAMRA ale festival in November, but missed the deadline by some months. On paper I’d been messing around with a recipe (mainly hop and yeast selection, and a standard malt bill), and so as far back as probably July I’ve been thinking about Bitter.

Bitter is my favourite beer style of all, and it just doesn’t seem to exist in great quantities in Ireland, apart from my occasional trip to Wetherspoons in Derry, where it is served on handpull. It’s time to brew one for the house, for my own set of beer pumps.
 
The recipe is fairly standard, except that I’ve used a lot more wheat than usual, as I want to really nail the head retention this time. I’m also watching the calcium content for the same reason. The brewing guidelines I’m using today come from Nigel Sadler’s book ‘Notes on Craft AleBrewing’. It’s and excellent reference book, full of calculations and science, and has helped fill in a few gaps that other books have missed. The ‘rules’ that I’m specifically adhereing to are the water guidelines, hop rates and method, yeast pitching rates and so on. If you’ve read the Brewing Elements series, then I can recommend this book too, though it’s more use as a postscript than an introduction.

The yeast comes from the dregs of a bottle of Fuller’s IPA. Yeast culturing is something I haven’t had a proper go at yet, normally opting for sachets of dry yeast (I see nothing wrong with dry yeast, except for the lack of variety, which Mangrove Jacks have gone some way towards rectifying) or the slightly more expensive liquid options. WhiteLabs are fantastic; their standard range, plus the Platinum seasonals, strange new yeasts and bacteria thanks to Yeast Bay, and now even rarer yeasts WhiteLabs ‘the Vault’, it’s a great time to be a homebrewer. However, in the microbrewery, it’s nearly ten times as expensive (or thereabouts, nobody will actually give me a proper price) to buy liquid as dry, for the quantity I need, so I wanted to do a few trials of the stirplate first. I couldn’t be happier with my first effort! The idea is to buy an €8 vial of WhiteLabs and culture it up to the 750g yeast that I need for a brew. This will open up a world of yeast for use in the brewery, without the increased cost.
Just like cats, homebrewers know the warmest places in the house.
Instructions for making a stirplate and starter are readily available online, and I made mine for nothing, using stuff I had lying about the house. One of the options to consider is one magnet or two. That decision was made for me by misplacing one of the pair. The magnet sits in the centre of the computer fan, and works fine. I expect both ways have their merits. Practice using your stirplate with a glass of water first, to see what stirbar size and speed etc will do. I bought a packet of stirbars in various sizes from eBay, which gives me plenty of options, from the tictac sized stirbar for small starters, through liquorice torpedo sized, onto half-a-fudge, which should works in a demijohn.

Just FYI, then, I added 200ml of 1.020 unhopped wort to the dregs of a bottle of Fuller’s IPA, stirred that, increased that to 500ml at 1.030, then one more step to 2 litres of 1.040.


The recipe itself is standard enough:
Pale, 3240g (81%)
Crystal 80, 320g (8%)
Wheat malt, 400g (10%)
Chocolate Malt, 40g (1%) for colour adjustment – I’ve been drinking golden beers for ages


Mashed at 67oc, with water adjusted to
<40ppm alkalinity,
150ppm Chloride,
300ppm Sulphate, and
100 - 200ppm Calcium.
Spargewater the same.

Copper volume, 24litres at 1038, should give me a 20 litre ferment at 1040.
Northdown 6% to bitter, to 30IBU (29g pellets)
Pilgrim 10% at 15 minutes, 15 grams, and ten more at flameout. Some protafloc at 15, too.

Yeast, Fuller’s IPA (I hope it’s not a lager strain used for bottle conditioning, now I’ve gone to all that effort!). Pitched the fresh slurry at 22oc, god knows how much or how little, but


Tasting notes to come.

Thursday, March 31, 2016

Sparklers

I'm wading in with sparklers. I've had some sort of beer blog for long enough now, I've earned it.

Pride of place in my rudimentary home bar is my Higene beer engine. Pride of place at the end of the swan-neck is a sparkler! I've read almost every other blog post and forum thread on these plastic things so far and I can't summon a third of the passion for anything that most drinkers have for one side of the argument or the other. As I see it, it's horses for courses.

Small, loose sparkler.
No sparkler: Brewer's choice, drinker's choice. Doesn't knock out much carbonation, fluffy head. If the beer is hoppy, it will still be hoppy. The southern pour.

Loose Sparkler (r): Quarters the beer. Much the same as not using a sparkler, really.

Angram Sparkler: These sparklers come in a variety of colours, with each having 16 holes of different sizes: green has holes of 1mm diameter, black 0.8mm, and white with holes at 0.6mm. There is a lot of resistance in the smaller holes. I just tried to blow through one of each.

Angram sparklers.

The green Sparkler is 'known' as the southern one, while the black one is known as the northern, for Yorkshire style beers. Interestingly, the only reference I have seen for a red sparkler, states that it is for Burton Style beers. Maybe it knocks out some of the sulphates.

I bought four Angram beer engines for an indecently small sum. One was marked 'Irish Stout', and had, firmly welded to the swanneck by old beer, a white sparkler. This, I presume*, pours with a thick, creamy head, as you'd expect on a pint of draught Guinness. Pub gas (a mix of nitrogen and carbon dioxide) was 'invented' to mimic hand-pulled beers, without the fuss of decent cellermanship.This mix delivers the likes of Guinness and creamflow beers with a low dose of carbon dioxide, making a smooth, creamy drink. Also known as nitrokeg.

The serving discussion should include the type of spout, of which there are two, swan neck and short. The swan neck is used with the sparkler, placed at the bottom of the glass, where there is a nib at the end of the sparkler to keep the holes about a centimetre off the bottom of the glass. This generates a lot of swirling cloud that settles up into the thick head and a crystal clear beer. Incidentally, the Guinness style cascading bubbles thing? Not unique to Guinness at all. The short spout allows the beer to fall into the glass, generating a nice, loose, bubbly head.

Not like this! Aaargh.

There is a lot more to the spout thing than I could hope to explain. It's about the drop in pressure as the beer exits the spout, and how this releases the carbon dioxide and so on. There's some chemistry involved with the oxidation process, too, I read, though I find that hard to believe simply because of the low temperatures and short times involved in this. People keep spouting stuff about how the beer aerates as it goes into the glass, and develops extra flavour. If anyone pours my pint like <--- that, they'll be pouring me a-bloody-nother.

In all, I have absolutely no preference, though I have noticed the beer is a little more bitter without the sparkler. I only own swannecks for now, and I hope to buy a short spout for one of the Angrams, just so I can see if there's a difference, but it's pretty low on my list of priorities.

For completeness, here are a variety of sparklers, including some fancy ones for soft drinks!


 *I'll be brewing a stout soon enough, and can't wait to try it through a sparkled beer engine. I read elsewhere that the sparkler vastly improves the maltier beer styles.

Monday, December 7, 2015

Carbon Footprint of your Home Brew

I've actually worked this out in one of my notebooks. It turned out to be a pretty hefty figure. I've only worked it out for the sugars consumed in the beer, for example, a five gallon batch of 1040 OG beer, fermented to 1011, will produce about 1kgof carbon dioxide. I agree, it sounds like a lot, but that's science for you.

http://www.guardian.co.uk/environment/green-living-blog/2010/jun/04/carbon-footprint-beer

Weep as you add in the airmiles of your beautiful American hops...

Cascade is grown in the UK, if you can get it, though it's mostly under contract. Still a lot of miles for your beer. Buying, growing, picking and using local is the only answer. To look about growing your own hops, here's a handy link!

www.gyohops.blogspot.ie

 If I can do it in northernmost Ireland...

Tuesday, July 14, 2015

Beer engine happiness.

I suffer from chronic nostalgia when beer is concerned. I absolutely love beer engines and the velvet beers they dispense, even though I only had my first pint of cask about 5 years ago. But in my mind I've been an old flat-capper for decades. This is why I had to buy a beer engine from the internet.

Ebay is a fantastic source of everything. I got mine about two years ago, from some pub somewhere or something. I don't know. About £40 delivered, anyway. It worked fine for a year (that's about 3 brews), before it started pumping more beer out from the piston seal than it did from the spout. I finally ordered a new seal set for it last week.

Seal kits are a little expensive. I'd say about the same as their weight in gold. Crap for a few bits of rubber. But they are very unique bits of rubber, and at £28 delivered, you'll soon realise you'll make the money back in sheer joy at not having to wipe the carpet after every pour.

I'm not going to go mad on the detail here, but hopefully the following pictures will help you see what's inside of a Higene beer engine.

The key is to put it back together EXACTLY as you took it apart. Take photos or draw or arrange neatly on a table. Mostly it's fairly simple, but the cylinder needs some care.

If you buy one new and it's not working great, then force some water into it (with a hosepipe is best), and let that sit for a while to loosen up the rubber seals a little. You might find it works fine. You'll still want it taken apart and cleaned. You'll see why when you do it.


  I've replaced the pipe from the top of the cylinder with a 3/8" JG to 3/8" stem (elbow) and a shorter piece of braided hose. It works much better than the bit of kinked hose, and the original hose was black with age.
 Washer Left; curved edge facing down/trench upwards, second washer (big & brown) above that, kept in place by the third washer, and the fourth just floats somewhere up the piston rod. I bought the seal kit and was horrified to see that the brown washers start life transparent. 
 These pictures really aren't in any order.

If yours isn't pulling a full measure, then adjusting the thing in the picture above will sort it out, after a little trial and error. Or just pull another bit out.

The key is to swear a lot when putting it back together.

When fixing it to your bar (what do you mean you don't have a bar?) it will be quite rough on whatever the bar top is made of. Not in a scratchy way, but in a "if your bar top is not nailed down properly it's coming off" kind of way. Also, it only goes half -way on, so cutting a slot out of your bar top will support it better, but it's not strictly necessary. I'll post some pictures of my bar towards the end of summer.

Tuesday, January 6, 2015

Eyes on the prize... Yeast handling

What's that thing you say about wise men, or the more you know the more you whatever? Well, the same applies in brewing. I've spent the last four years honing my brew kit, my mash efficiency, bottling and kegging, recipes and above all else speed, or brewday efficiency. I'm getting the hang of it now, I think. However, one thing still stands in my way; taking good care of my yeast.

My process has been honed over the years, as I've improved my recipe design, mashing, boiling, hop additions and all the processes in between and after (bottling and kegging, serving temp, condition). The intermediate step, fermentation, is all down to the yeast. Mishandled yeast can, at best, behave a little odd, throw out some unusual flavours, or take a while to start or stop. Sometimes a poorly treated yeast will give you some bad flavours and aromas. I've got to the point now where that kind of thing is no longer tolerable, and it's apparently bad form to blame the yeast. Acetaldehyde (green apples), Diacetyl (butterscotch), solvents (pear drop esters at best, nail polish remover at worst) phenols (smokiness or pepperiness) and some rubbery aromas if allowed to die and disintegrate in the wort.

So, in the same way as I developed my other brewing skills, I'm now paying some close attention to my yeast. I do have a microscope, but haven't been able to use it properly yet, as I can't get hold of Haemocytometer plates. Nevertheless:

1: Pitching rates- at it's simplest, for a standard strength ale (up to SG. 1060) a single sachet of dried brewers yeast will work fine. For a lager, buy two. They're not expensive. Rehydration can take place before, or by addition to the cooled wort. Rehydration advice found here: http://www.fermentis.com/wp-content/uploads/2012/02/SFA_S04.pdf

For wet yeast (or liquid yeast) I believe one vial treated well will work for a standard strength ale, and again cough up for two if you're brewing a lager, but preparing a starter is the best treatment here.

Repitching yeast from a previous batch (slurry) can help reduce the cost of buying two or more sachets or a vial. Depending on how fussy the yeast, or how obvious it will be in the final beer, I'll either pitch straight onto the yeast cake in the fermenter, or scoop some out (in a sanitary manner) for use later.You wouldn't pitch a pale beer straight onto a stout yeast cake, for example.

2: Temperature- best not to pitch while too hot, or to have a temperature jump from yeast temperature to wort, or large fluctuations in temperature during fermentation (with the exception of a specific fermentation profile, like crash cooling, Diacetyl rests or increasing temperature for Belgian style beers or for attenuation). Also, keep the beer at a suitable temperature for the beer. Warmer temperatures tend to create more esters, while cooler fermentations, though slower, produce a cleaner beer.

Most beers ales are fine fermented between 16 and 20 degrees C, but do check. Also, picking yeast best suited to your actual ambient temperatures can work. WLP029 Kolsch yeast is a warm lager yeast, fermenting a clean beer at ale temperatures, and I've got Nottingham to work quite well at quite low temperatures.

3: Style- pick a yeast suited to the beer style brewed. I'm spending a few extra euros for wet yeasts, of which there is a much wider variety. Spending more money on Saaz and brewing water adjustments, pilsner malts and making space in the fridge is a waste without the perfect yeast for the job*. That's not to say that good beers can't be brewed with other yeasts, of course. Stout brewed with Belgian yeast, IPA with Brett,

My next step is to make a stir plate (read here for the reason I chose not to http://www.jimsbeerkit.co.uk/forum/viewtopic.php?f=12&t=70926), and aquire some Erlenmyer flasks in order to make some starters a few days in advance. I've bought a pressure cooker to sterilise wort in jars, and then I'll feel I've really got the hang of brewing.

*And for this prize of which I mention in the title, the yeast is Vermont IPA yeast (Conan). This is being fermented warm in my specially designed fermentation chamber (which has cost about a tenner to make from begged stolen and borrowed gizmos). The beer is an America IPA for the Galway brewer's competition. It didn't make it in, after all, but I enjoyed drinking it, I suppose.

Friday, April 4, 2014

Sluggish Hop Plants

If your hop plant isn't really taking off already, for example the buds are still at ground level, check the soil for Vine Weevil larvae. These small white grubs, about the size of a two cent coin, eat through the roots around the main plant, and leave your plant struggling to grow. I found 25 in one pot. One is too many.

The pictures below are of the larvae and of the damage that they do. They leave behind a light orange sawdust, and severed rhizomes.

To check your hop:
1 - give the stump a wiggle. If it's loose then you probably have a problem.
2 - Dig around the plant. It won't mind. It knows it's for the greater good. They're really easy to spot, bright white against the soil. They will mostly be within the top inch or two (deeper if you mulched like a good boy/girl).
3 - If you find any, do your best to dig around the whole plant where the soil feels loose and pick them all out. Destroy them by squashing or drowning.
4 - While you're there, pick out anything else that isn't a worm. Leatherjackets (weird fleshy brown tubes, the larvae of Daddy Long Legs), slugs and millipedes (the black ones).
5 - check the soil before you put any back, or better still, replace it with fresh compost.

Do it now while the hop is still feeding on it's rootstock. Don't worry about little white roots.

Fundamental critter rule: If it's slow, it's got to go. If it's fast, ... something something last.

It's April 4th, and most of my hop plants are putting out bull-shoots and several other smaller shoots, so the ones that are struggling are pretty conspicuous in their sluggishness. Check them or you'll get no hops.

Damage

Vine Weevile Larvae. AaaaaarGH!


If you have them in one pot, you're likely to have them in all. Check! They seem to prefer pots to plants in the ground, so far...

Thursday, April 3, 2014

Hop Plant Bull Shoots

It's the time of year when hops start having big ideas again. Two sunny days and they're OFF!

You may have heard about 'trimming the first gamey shoots', or 'removing the bull shoots' and not been clear which they are. Well, here's a photo.

The bull shoot is about 6 inches long where the others are barely an inch. In this photo, of a second year First Gold, there are two bullshoots that are both over half a foot. After this photograph was taken I cut them back to ground level in order to let the others grow. Eventually I will select only two or three of these to grow on, and snip back the rest.

Bull shoots are no good as the internodal distance, or gaps between the leaves are quite large. Seeing as the cones are produced here, in order to get a higher yield you need more nodes, which you get in the later shoots.

For now though, that is all you need to do with the hops. The second set of shoots will grow at a steadier pace, so you've nothing more to do this week.

Next job: Putting the bines to string.
For more information on hop growing, visit:
www.gyohops.blogspot.ie
This picture was taken on 3rd April.

Sunday, March 2, 2014

Judging at the National Homebrew Club competition

It's a tough job but someone's got to do it!

1st March, St. David's Day, and I've to catch the 0430 bus to Dublin. It's a long trip down, but it's the last in the series of my journey to becoming a judge. It's been emotional.

The last beer before lunch.
The day started with registration; getting your name badge and picking what you want for lunch. I was asked to judge category 10A, American Pale Ales, so sat down at a table next to Sarah, owner of the new N17 brewery in Tuam. It was a pleasure to judge alongside Sarah, who certainly knows her stuff. We were within 2 or 3 marks on all beers, so allocating a score was fairly straightforward.

miniBOS
Once we'd judged our flights, a total of 9 beers, I think Sarah went and found the Stout table and I settled amongst the American IPAs - as if I hadn't already had all the hops I could take!

The judging was quite easy in terms of picking which beers suited the style more than others, but filling in all the spaces was a little tricky on some scoresheets. I hope the information I put in is useful to the brewers.

After that I sat down to clear my palate and head for the mini Best Of Show round, which took place once all the category 10 beers had been judged. That left me and Ronan about 18 beers to sort through and pick the best.

Sorting through 18 beers to quickly asses which deserves to go through to the Best Of Show in Cork was like drinking 18 shots of beer. The aul head was spinning by the end of it.

As bus o'clock drew rapidly nearer, the silver medal in category 1 was announced, and it was me! A quick gulp of champagne, a handshake or two and I ran off out the room, up the street with a big grin on my face!

I had a fantastic time. The taxi driver who took me to the bus at 4am asked me if I was getting paid for judging, or even getting travel allowances. To be honest, with all those lovely beers, people and the craic, I'd nearly consider paying for the privilege of judging again. Thanks to Renier, our steward, as well as all the other stewards who helped us in the miniBOS.

What a day.

Interested in being a part of Ireland's biggest homebrew community?
www.nationalhomebrewclub.com

Wednesday, February 5, 2014

One Step Closer

This morning I passed the BJCP online exam. It's a 200 questions in 1 hour exam, with questions usually about style comparisons, or what elements you'd expect in a beer style.

I answered all the questions, although I'm quite sure not all of them were right. The Multiple Choice Multiple Answer questions were tricky enough.

To celebrate I'm drinking a small glass of under-carbonated and under-attenuated Irish Red Ale, which clearly demonstrates that good at theory is not good at practice.

Nevertheless, I'm now a Provisional Judge, ready to take the tasting exam in Dublin this weekend.

What does one wear to a tasting exam, when it coincides with a Welsh-Irish 6Nations rugby match...

Tuesday, January 21, 2014

Happy New Year again.

This must be my fourth or fifth new year as a homebrewer by now.

First, thanks to anyone who got in touch this past year to leave comments or ask questions. I hope I was helpful, and will try to do more of the same this year. To that end I'm:
  • a few weeks off becoming a BJCP approved beer judge
  • putting my name on the judging list for the NHC
  • taking an online course in Beer Chemistry from Oklahoma University
  • still brewing many and varied beer styles
  • growing ingredients to make some very personal beer
But I won't be doing the following:
  • a dry January.
Firstly, and with huge thanks to certain members of the National Homebrew Club here in Ireland (with a supporting part played by Bus Eirann), I'm well on my way to becoming a beer judge. With only a few more weeks until the beer tasting exam (with no less than BJCP President Gordon Strong as proctor), I've to continue tasting beers (harder work than it sounds) and sit an hour-long online exam.

Meanwhile, I'll continue to feel out-of-my-depth learning about beer biochemistry, with words like Polysaccharides and 1,4 - alpha linkages.

Brewing Botanicals
I've beer to brew, including some for the March 1st Nationals held by the National Homebrew Club in Dublin, and I've been promised a Brewferm Mash Kit by HomebrewWest.ie to review.

Finally, I'll be growing Yarrow, Wormwood, Sage, Tansy, Hops, Bog Myrtle and so on, in order to make the most interesting beer Mov-town has ever tasted.

For now though, I'm going to finish up my notes on Lipids, have a cup of tea, and think about the next blog post: "How to be come a Beer Judge".

If you find any of the above interesting, there's a good chance I'll mention it some more in the following posts. For now though,


Happy New Year.

Wednesday, December 4, 2013

Brewing Britain - Andy Hamilton

Congratulations to author and forager Andy Hamilton, of Booze for Free fame, on the release of his latest book, Brewing Britain. 

http://www.amazon.co.uk/gp/product/0593072405/ref=as_li_ss_tl?ie=UTF8&camp=1634&creative=19450&creativeASIN=0593072405&linkCode=as2&tag=selfsufficien-21
Available in all good book stores, and Amazon.
Brewing Britain takes you on a trip through brewing history, buying and growing almost all of the ingredients, malting barley, and drying hops, and plenty more besides.

But most of this is preamble to the main point of the book: brewing beers of the styles commonly found in Britain. Milds and Bitters, IPAs, Stouts, Porters, Saisons (!?) and the odd lager. These come with style notes, common ingredients, commercial examples with tasting notes and a series of tried and tested recipes for making your own classic example.

To finish, Brewing Britain indexes a whole flight of beer festivals, all year round, for you to impart your hard won knowledge/try out your new skills.

Oh, and I've got a beer in it!!

The book would suit anyone with an interest in beer: from kit and all-grain brewer to Beer Sommelier and Real Ale Twat*. And it is coming up to Christmas…

*Viz. That is, Viz, not viz.


Monday, December 2, 2013

Tiger Beer clone, all grain.

And a bit about mash pH lower down.

Most visits to this blog come from people searching for tiger beer clones. I’ve referenced it a couple of times, including one previous attempt at the beer, which worked really well. It was mooched from the Dave Line ‘Brew beers like those you buy’ book, with a change here or there (not necessarily because I know what I’m doing, or anything). The first attempt worked quite well, the second was infected, and for Ms Homebrew, the third attempt will be ready in the new year.

This is a 'lite' lager beer, of the kind found in Asia and thereabouts.

3kg Lager Malt (Pilsner malt)
500g flaked rice
300g Carapils or similar
200g Acid malt
Recommended, 200-500g of rice husks or oat husks, as the mash Will be slow to run off.

Mashed in for a rest around 55oc for 30 mins, followed by the main rest at 66oc for one hour, in 10 litres of soft water.

Boil:
Hallertaur Helsbrucker (2.8%): 25g, 11 IBU
Dana (Super Styrian)    (10.8%): 7g, 11 IBU

Flavour, Hall. Hersb., 10g @ 15 mins with a dose of Irish Moss
Aroma, Tettnang (German), 10g @ 0 mins.

Cool and strain.

This should yield 20 - 22 litres at 1038, which can be fermented with Brewferm Lager yeast, though this time I'm using a sachet of Saflager 34/70 sprinkled into the wort. If you can ferment it at the proper temperatures, do so, otherwise do as you can. Warm is NOT your friend here, though.

A diacetyl rest (14oc about 3/4 of the way through fermentation) is advisable.

Tasting notes to follow.

Rice & Carapils:

It may seem counterintuitive to use rice flakes to lower the beer's body, and carapils to boost it, but what I'm trying to achieve is a beer with very little malt flavour, but some body. Using rice alone will reduce taste and body, but I can add some body back in with carapils (dextrin malts, etc), and as carapils is also tasteless in the beer, it won't affect the malt flavour balance. In addition, I will use relatively high carbonation to give the impression of body.

Mash pH:

Most lagers benefit from a little acid malt to help with mash ph, and in spite of having soft water piped into the house I do have to use it in all my brews to help the ph level. I’m quite happy to do this alongside Burton liquor treatments in my Bitters.

An alternative is to use an acid rest into your mash schedule. It’s at about 35oc (up to 40oc), and should last about 3 hours (or overnight). The acid rest allows the lactobacillus bacteria that are all over your barley malt to flourish for a short period of time, which tends to acidify the liquor. The bacteria don’t make it into the finished beer, though.

Acid malt, though, has already been through this step. Every 1% added to the grist decreases the mash pH (that is, acidifies) by 0.1; so if your tap water is fairly soft, like ours at pH 6.5, to get it at the perfect pH for efficient enzymatic activity which is below 5.5 I’ve added it at 7.5% of the grist (not recommended over 10%).

Acid malt is otherwise the same as your pale malt, so decrease the amount of pale malt used appropriately, which will keep your grist ratios in check. Weyermanns' acid malt is from two row barley, so will not add haze, like you might expect from 6row barley.

Tasting Notes:
The beer is ready, having been lagered at cellar temperature. Hardly lagering at all! After about 3 weeks in the bottle it's nearly perfectly carbonated. 

Aroma: Moderate Ethyl Hexanoate (apple-y), some floral hops, and a moderate grainy aroma.
Appearance: Straw, ever so slight haze, long lasting rocky white head, with a nice beading carbonation.
Flavour: Typically low for a light beer, can taste a little grainy, and a little apple-y. 
Mouthfeel: Nearly a very light body, with a brisk carbonation (though missing the carbonic bite), and some residual sweetness. Very light bitterness.
Overall Impressions: Some tiny modifications to the recipe and I need to pay more attention to ester production (temperature and pitching rates). Otherwise very good.

There is a little residual sweetness, it's medium-light bodied, with a medium high carbonation.

I continued to drink this beer over the course of another month, and the flavour improved dramatically in that time. The yeast cleared up the aetaldehyde (in both this and a Munich Helles I reused it in) and left a delicious and refreshing beer. This beer certainly needed the time to improve and all of a sudden I've gone and run out!

This beer won a silver medal at the National Homebrew Competition 2014, run by www.nationalhomebrewclub.com